
Garage door openers are an essential part of modern home convenience, allowing you to easily access your garage with just a button press. But they do more than that—they also contribute to your home security by controlling one of the largest entry points to your property. It’s important to keep up with garage door opener maintenance to avoid unexpected breakdowns, safety hazards, and expensive repairs.
Key takeaway:
Regular maintenance is crucial for the safe, efficient, and long-lasting operation of your garage door opener.
This Ultimate Guide to Maintaining Your Garage Door Opener covers:
- Essential garage door opener maintenance tasks every homeowner should know
- How to spot issues that require professional attention
- Long-term tips for protecting your investment and keeping everything running smoothly
Stay informed, protect your home, and extend the life of your equipment with practical steps you can start using today.
Understanding Your Garage Door Opener
Types of Garage Door Openers
There are three common types of garage door openers, each with its own set of advantages and disadvantages:
- Chain Drive: Uses a metal chain to operate the door. It is robust and cost-effective but tends to be noisy, making it less ideal for garages adjacent to living spaces.
- Belt Drive: Employs a rubber belt instead of a chain, resulting in quieter operation. While it is more expensive than a chain drive, its smooth performance and reduced noise make it suitable for attached garages.
- Screw Drive: Features a threaded steel rod to move the door. This type requires less maintenance compared to chain or belt drives, but can be noisier and is sensitive to temperature fluctuations.
How Garage Door Openers Work
Garage door openers function by using an electric motor to move a trolley along a rail. The trolley is connected to the door, and as the motor operates, it pulls or pushes the door along the tracks.
Key components include:
- Motor Unit: Powers the opener.
- Trolley/Carriage: Moves along the rail, pulling or pushing the door.
- Rail: Guides the trolley.
- Drive Mechanism: Chain, belt, or screw that operates the trolley.
Understanding these basics helps you recognize specific maintenance needs for your type of opener. Knowing whether you have a chain, belt, or screw drive system allows you to apply appropriate lubrication, tension adjustments, and other upkeep tasks effectively.
Essential Maintenance Tasks for Garage Door Openers
1. Inspecting Door Operation
A thorough garage door opener inspection starts with simply watching and listening to your door in action. This is the first line of defense against costly repairs and a vital item on any maintenance checklist.
Observing Door Movement
Stand inside your garage and watch as you open and close the door. Focus on the movement: Is it smooth and steady, or does it jerk, hesitate, or stutter?
Jerky or uneven motion often points to issues like misaligned tracks, worn rollers, or even warped panels. Catching these early prevents excess strain on your opener.
Listening for Unusual Noises
Pay attention to any sounds coming from the garage door system while it operates. Look out for grinding, squeaking, banging, or scraping noises—these could indicate potential problems.
Grinding may indicate that gears within the opener motor are wearing down. Squeaking points toward dry metal parts needing lubrication. Banging could mean loose hardware or an unbalanced door hitting its stops too hard.
Consistent operation should be relatively quiet; any sudden change in sound deserves attention.
Checking Door Alignment
With the door closed, stand back and look at how it sits within the frame. The gap between the door and frame should be even across both sides and along the bottom.
Misalignment can cause the opener to work harder than necessary and may eventually lead to mechanical failure or security vulnerabilities.
If you notice that one side appears higher than the other or doesn’t seal flush to the floor, this is a strong indicator that alignment needs adjusting.
Regular inspection allows you to catch minor problems before they escalate into bigger ones. Identifying issues early keeps your system running efficiently and extends its lifespan.
Consistent application of these steps builds a habit of proactive maintenance. Each time you check your garage door’s operation, you’re investing in home security, reliability, and peace of mind—a core principle of any Ultimate Guide to Maintaining Your Garage Door Opener.
The next steps involve addressing other critical areas, such as clearing tracks and sensors to maintain unimpeded movement and ensure safety systems function correctly.
2. Clearing Tracks and Sensors
Keeping the tracks clear and sensors unobstructed is crucial for your garage door opener to work properly. Start by visually inspecting the tracks on both sides of the door as part of your garage door opener inspection. Use a soft brush or vacuum to remove any dust, cobwebs, or debris that could cause the door to get stuck or move unevenly. For tough grime, a damp cloth with mild detergent will do the trick—just be careful not to use harsh chemicals that could damage the metal surfaces.
Taking care of the sensors is equally important. Look for the safety sensors located near the bottom of each track. Use a clean microfiber cloth to gently wipe the lenses and make sure they are free from dirt and fingerprints, as these can interfere with their function. Also, double-check that there are no obstacles blocking the sensor path; even small objects or spider webs can prevent them from working properly.
Make it a habit to clean the tracks and sensors regularly as part of your biannual maintenance routine. By keeping these parts clear and unobstructed, you can ensure smooth door movement and minimize the chances of unexpected malfunctions during operation.
3. Lubricating Moving Parts
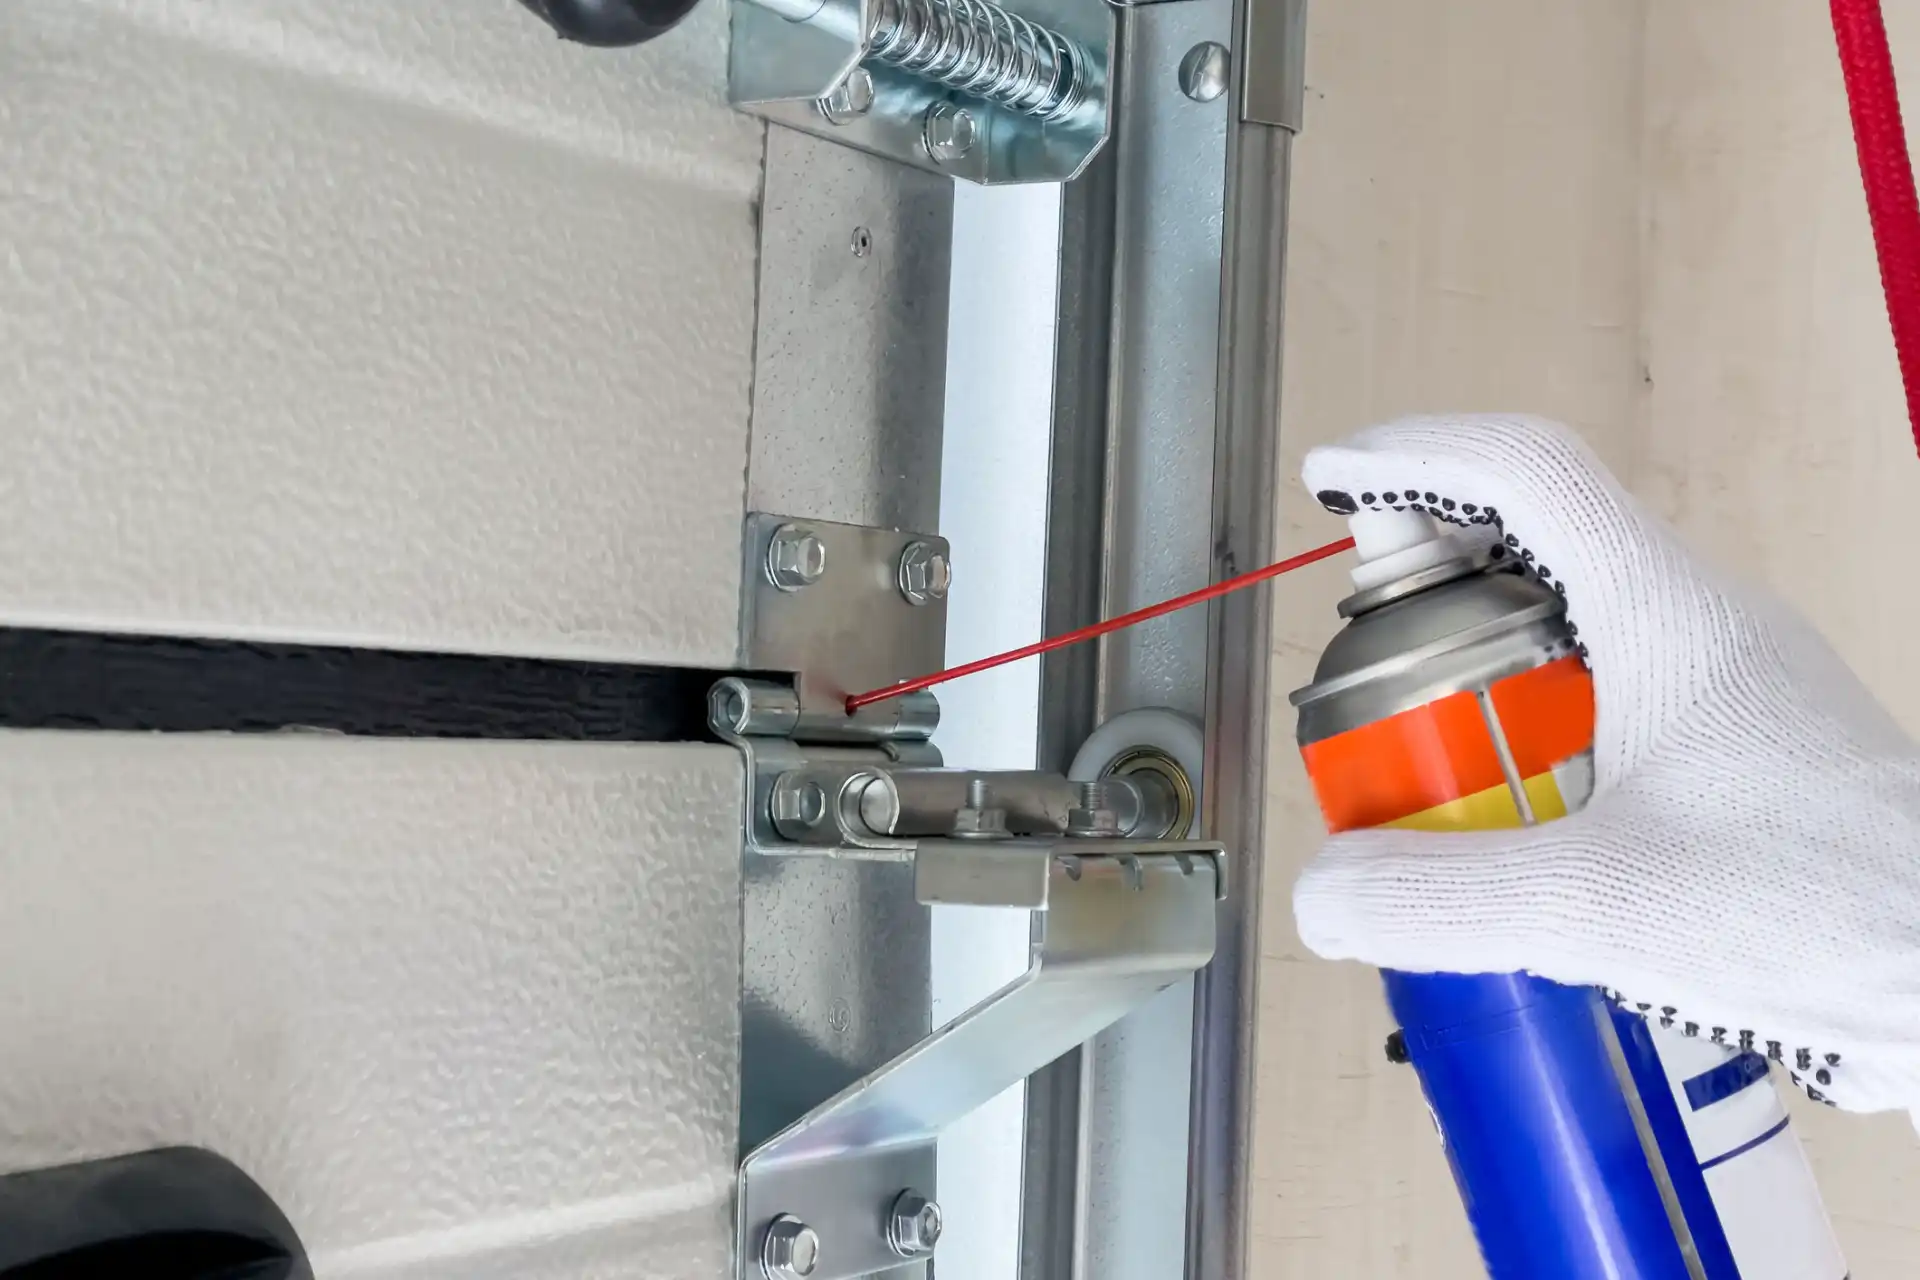
One of the most important tasks on any garage door opener inspection or maintenance checklist is lubrication. Regularly lubricating garage door parts ensures that your system operates quietly and efficiently. Pay special attention to the following metal components:
- Hinges: These are the pivot points on each door panel that allow it to fold and unfold smoothly.
- Rollers: These guide the door along its tracks, and metal rollers in particular benefit from lubrication.
- Bearings: Found inside pulleys and sometimes at the ends of torsion springs, bearings help reduce friction during movement.
- Springs: Both torsion and extension springs require a light coating of lubricant to prevent rust and wear.
When lubricating, use either white lithium grease or a specific garage door lubricant—steer clear of WD-40 as it removes essential oils. Apply a small amount directly onto the moving parts and wipe off any excess with a rag to avoid dirt buildup. Performing this lubrication twice a year will minimize any unusual sounds that garage doors commonly make and assist in maintaining proper door alignment during regular maintenance. This straightforward action not only prolongs the lifespan of components but also promotes smooth and secure operation, as detailed in the Ultimate Guide to Maintaining Your Garage Door Opener.
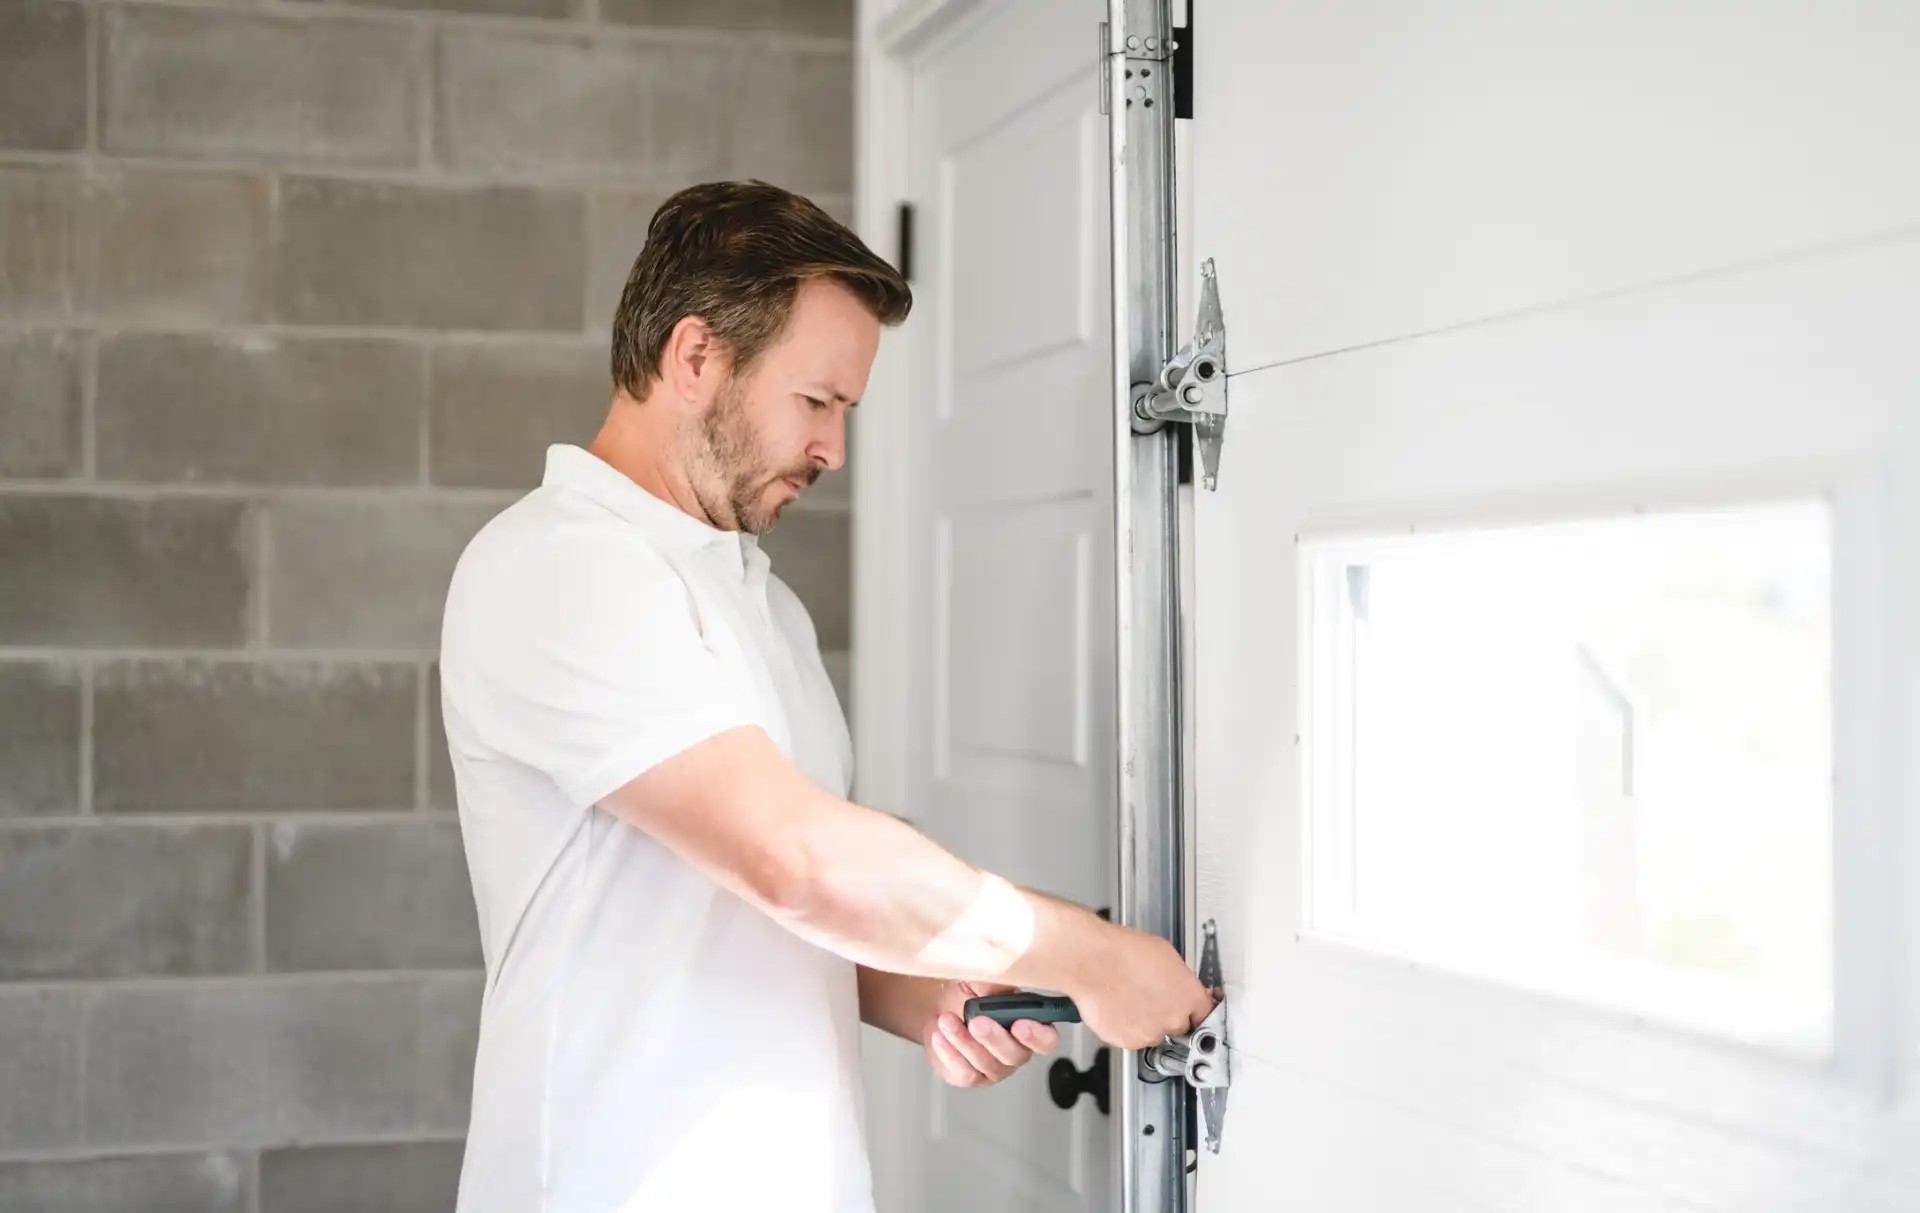
4. Tightening Hardware Components
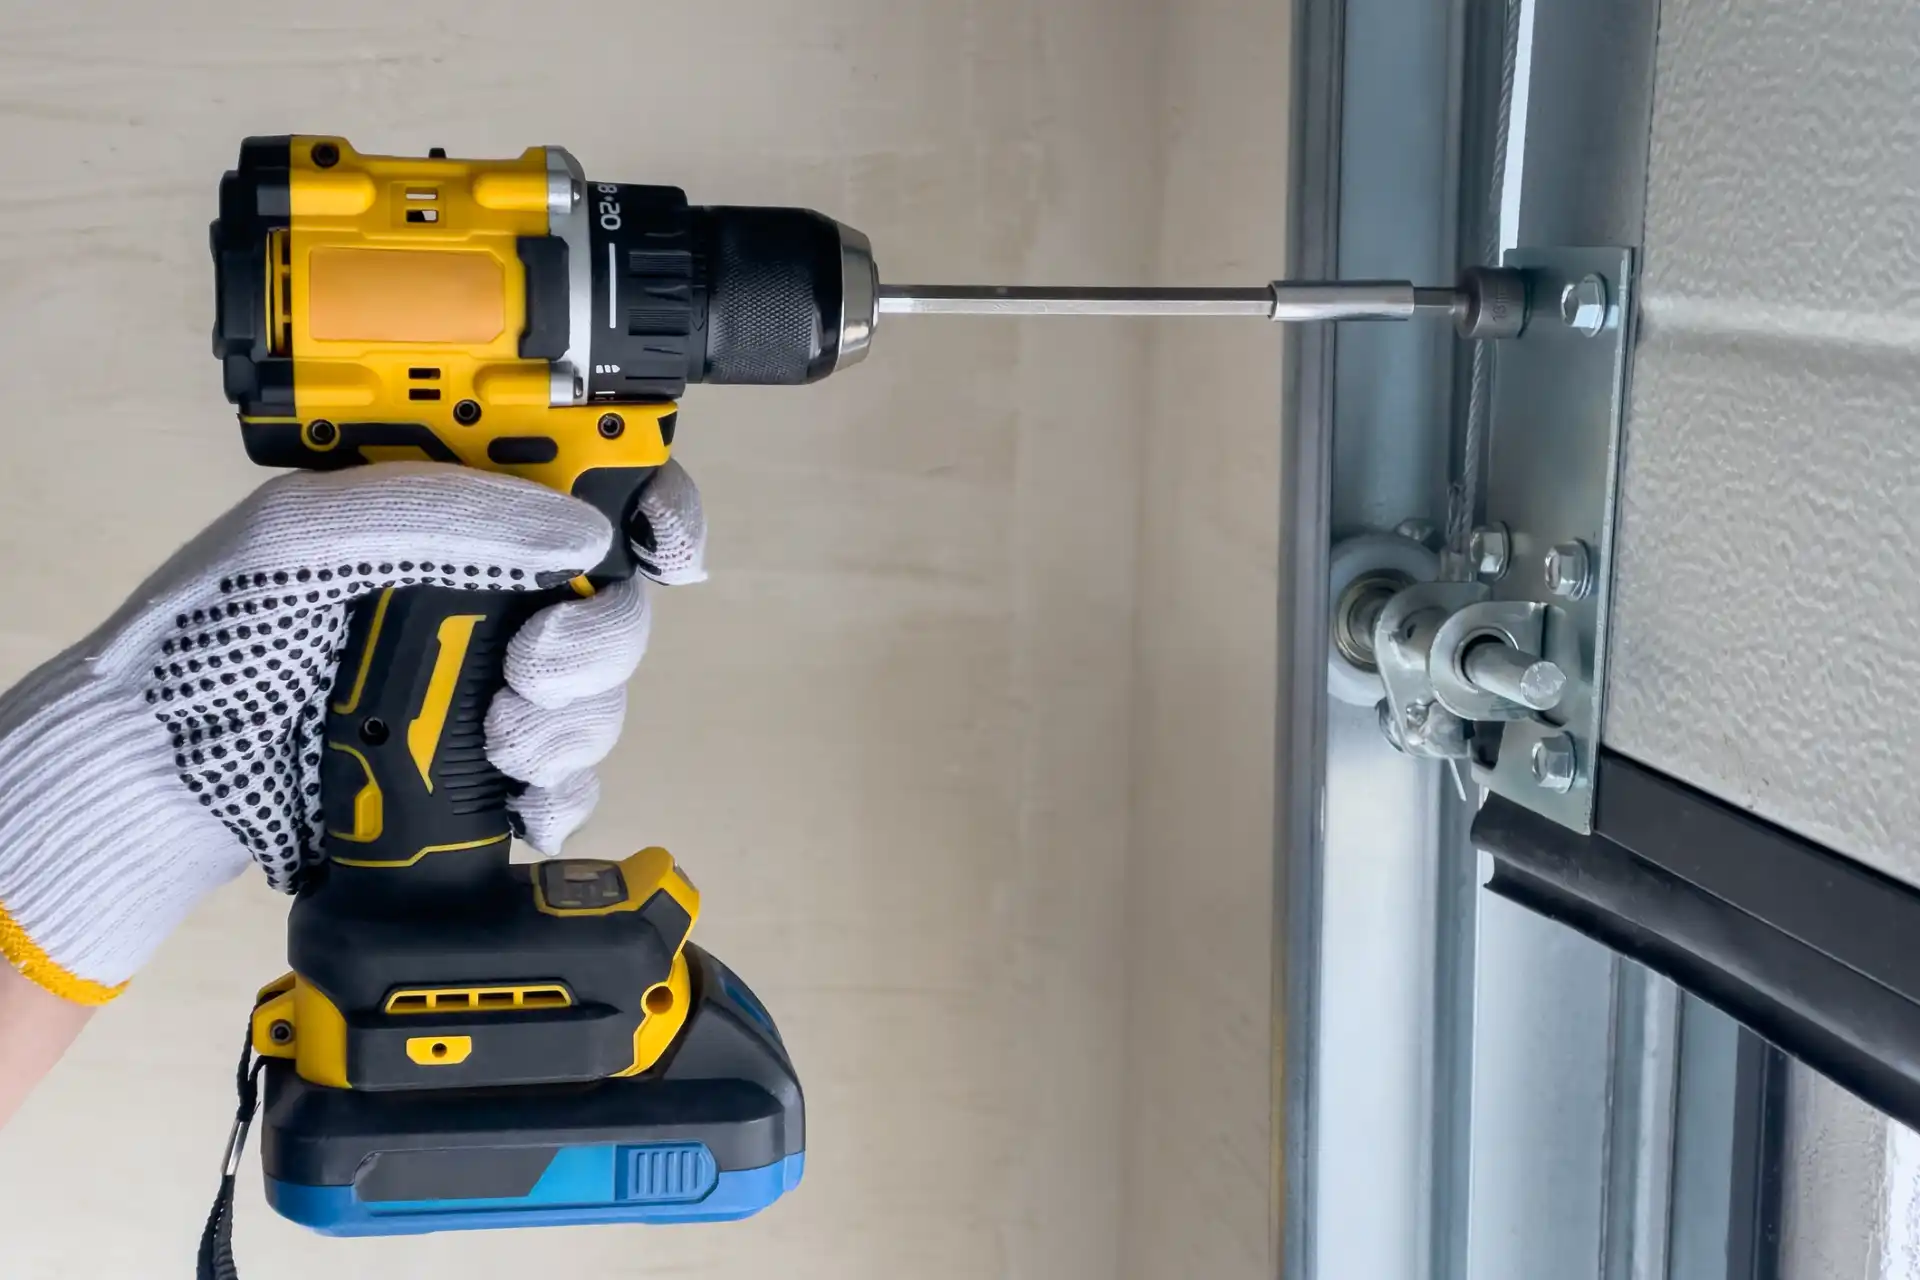
A thorough garage door opener inspection always includes a hardware check. Bolts, screws, and fasteners can loosen over time due to vibration and daily use, leading to misalignment or unwanted movement. Use a standard socket wrench or screwdriver for this routine task—both flathead and Phillips-head types may be required depending on your garage door model.
Steps for Tightening Hardware:
- Inspect all visible mounting brackets, hinges, roller supports, and tracks.
- Focus on the opener unit’s attachment points as well as the brackets securing the track to the wall and ceiling.
- Gently tighten each bolt or screw until snug—avoid overtightening, which can strip threads or crack materials.
Door alignment check is essential during this process. Loose hardware often causes uneven operation or unusual noises garage door owners notice. Mark this as a key point in your maintenance checklist. These steps are core to the “Ultimate Guide to Maintaining Your Garage Door Opener” and should be performed at least twice a year for optimal stability and safety.
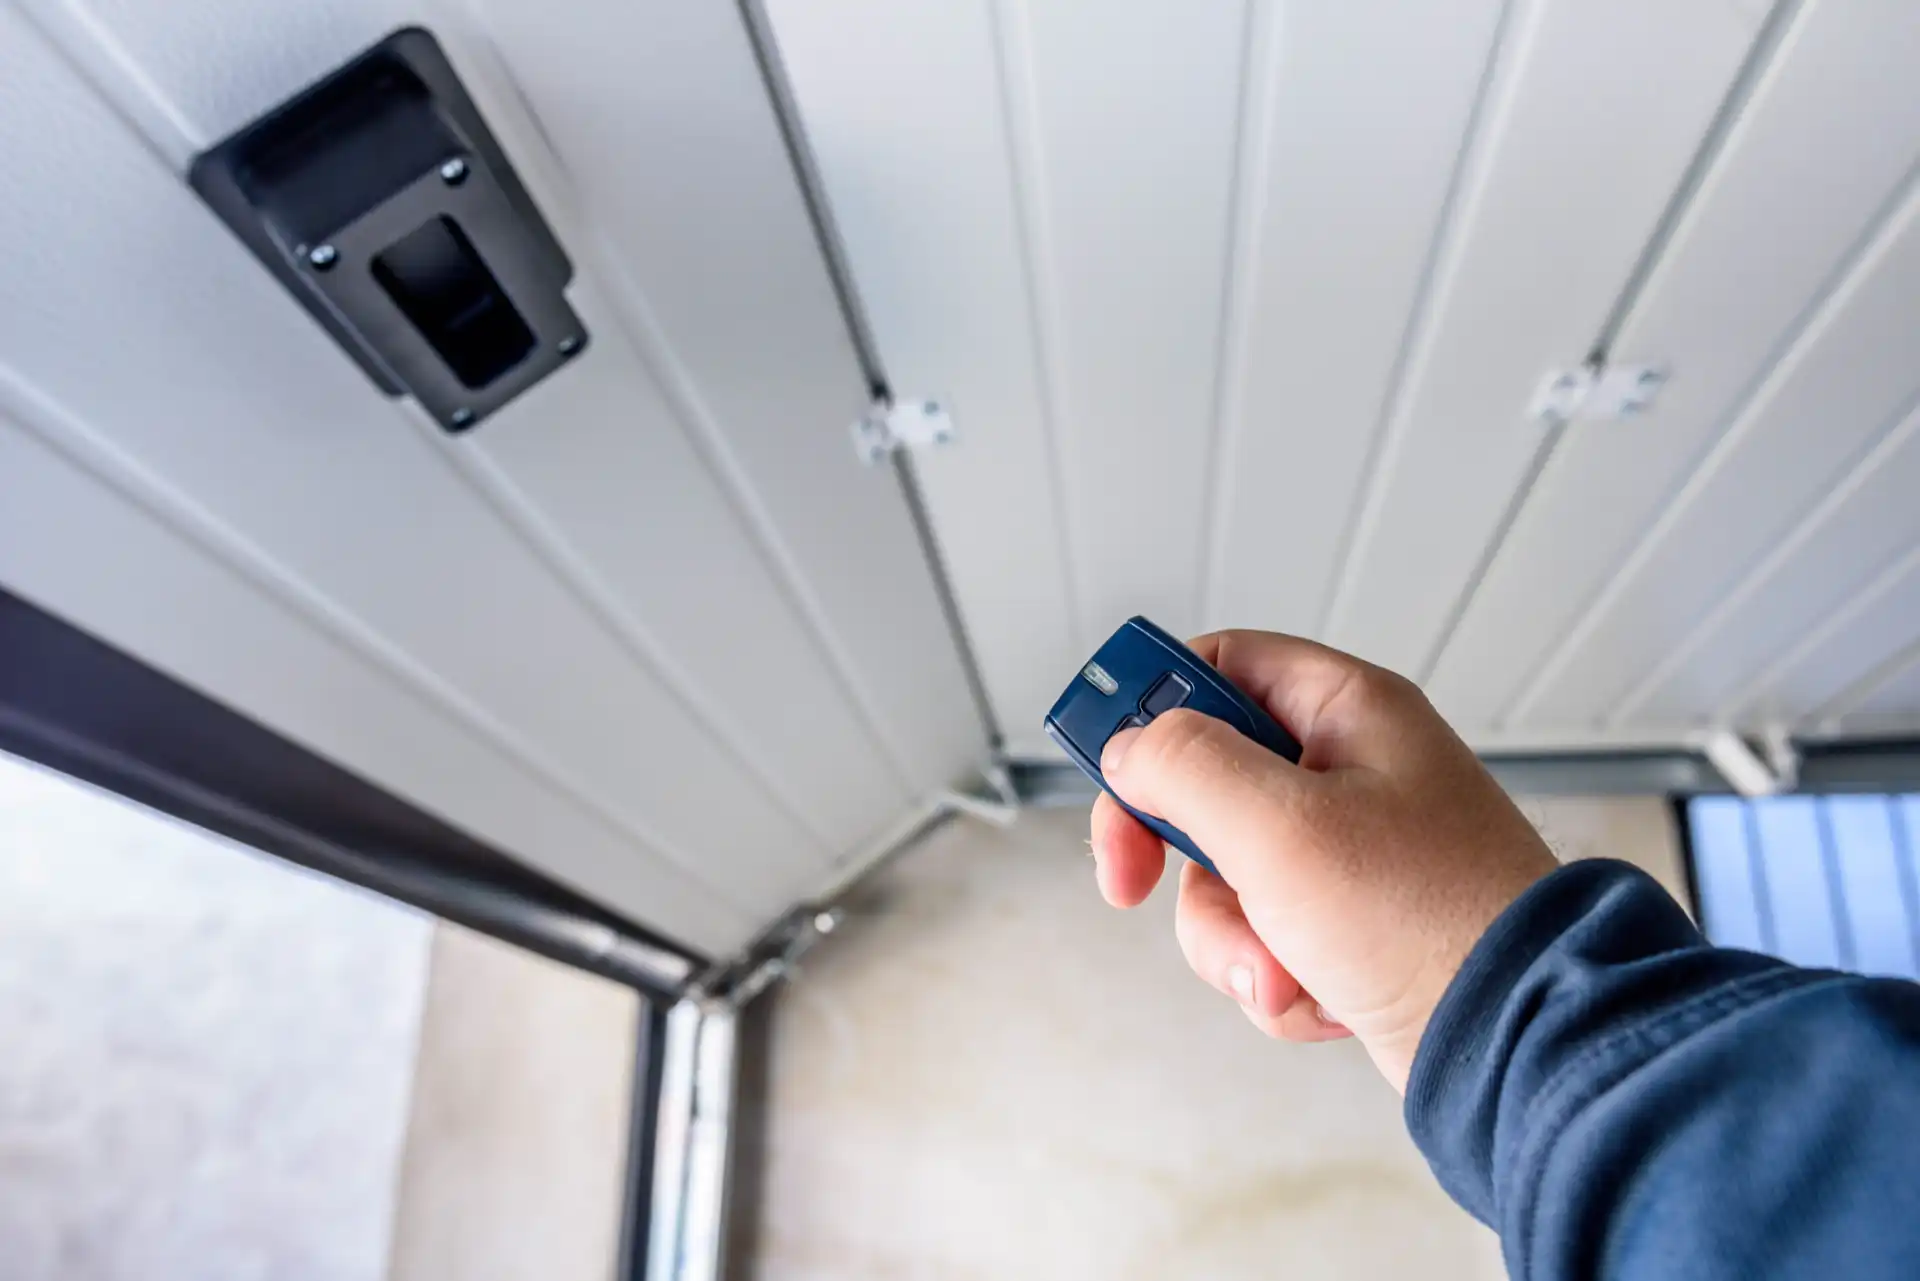
5. Testing Safety Features
Ensuring your garage door opener operates safely is paramount. Regular garage door opener inspection helps in identifying any potential issues early on.
Balance Test
Start by disconnecting the opener and manually lifting the garage door halfway. If it stays in place, the balance is correct. A door that falls or rises indicates an imbalance, which can lead to excessive wear on the opener.
Automatic Reverse Mechanism
Place an object like a 2×4 piece of wood in the door’s path and close it using the remote control. The door should automatically reverse upon contacting the object. This feature prevents injuries and property damage by ensuring the door doesn’t close on obstacles.
Regularly performing these garage door safety tests is crucial. They help maintain the alignment and functionality of your garage door, providing peace of mind and extending the life of your opener system.
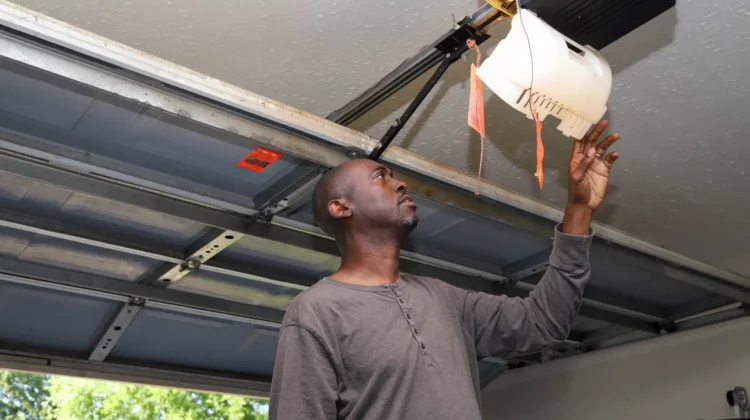
6. Replacing Batteries and Lightbulbs
Regularly changing the batteries in your remote control ensures that your garage door opener always works properly. Most remotes use coin-cell batteries (like CR2032). Replace these at least once a year, or when you notice decreased range or intermittent response during your routine garage door opener inspection. Open the back panel of the remote, replace the battery, and make sure the positive and negative ends are facing the right way for it to work.
Backup batteries in the opener unit also need attention. Many modern openers have a compartment for a 12V battery to keep your system running during power outages. Check your manufacturer’s instructions for safe replacement—usually every one to two years is recommended as part of your maintenance routine.
Maintaining the light in your opener allows you to see any problems, like strange sounds that garage door systems might make while working. Replace burnt-out bulbs with LED or incandescent bulbs approved by the manufacturer, avoiding high-wattage options that can harm internal parts. Clean the area around the bulb regularly for better lighting and safety.
By taking these simple actions, you can ensure that your garage door opener continues to work well and avoid unexpected breakdowns between scheduled checks and other important tasks outlined in the Ultimate Guide to Maintaining Your Garage Door Opener.
7. Cleaning the Garage Door Surface
Keeping your garage door clean not only enhances its appearance but also prevents damage and prolongs its life. The cleaning method depends on the material of your garage door.
Wooden Doors
Cleaning Agents: Use a mild detergent mixed with water.
Procedure:
- Gently scrub with a soft brush or cloth.
- Rinse thoroughly with a hose to remove soap residue.
- Dry immediately to prevent water absorption that can cause wood to warp or rot.
Vinyl Doors
Cleaning Agents: Mild detergent or specialized vinyl cleaner.
Procedure:
Wipe down with a soft cloth or sponge.
- Rinse well to remove any cleaner residue.
- Avoid abrasive cleaners that can scratch the surface.
Routine cleaning should be part of your garage door opener inspection and maintenance checklist. These tasks, along with other garage door maintenance tips, should be performed at least twice a year to maintain both the functionality and aesthetics of your garage door.
Additionally, consider incorporating some seasonal garage door maintenance tips into your routine for optimal results.
8. Inspecting Weatherstripping
Weatherstripping is an important barrier against drafts, moisture, and pests. As part of your garage door opener inspection and maintenance checklist, check the bottom seal along the base of the door for any signs of tearing, cracking, or looseness. Even small gaps can reduce insulation and allow rodents or insects into your garage.
Here’s what you need to do:
- Inspect bottom seals: Run your hand along the entire length of the weatherstrip to detect any soft spots or separation from the door.
- Look for visible damage: Replace sections that appear brittle, worn out, or detached.
- Check alignment: A properly aligned door ensures even contact with the weatherstripping. If you notice uneven wear or daylight peeking through, revisit your door alignment check.
Maintaining intact weatherstripping improves energy efficiency by keeping cold air out during winter and heat out in summer. It supports insulation maintenance while reducing unusual noises that garage doors make from wind or debris intrusion. Frequent inspections—at least twice a year—help you spot issues early and keep your garage dry and secure.
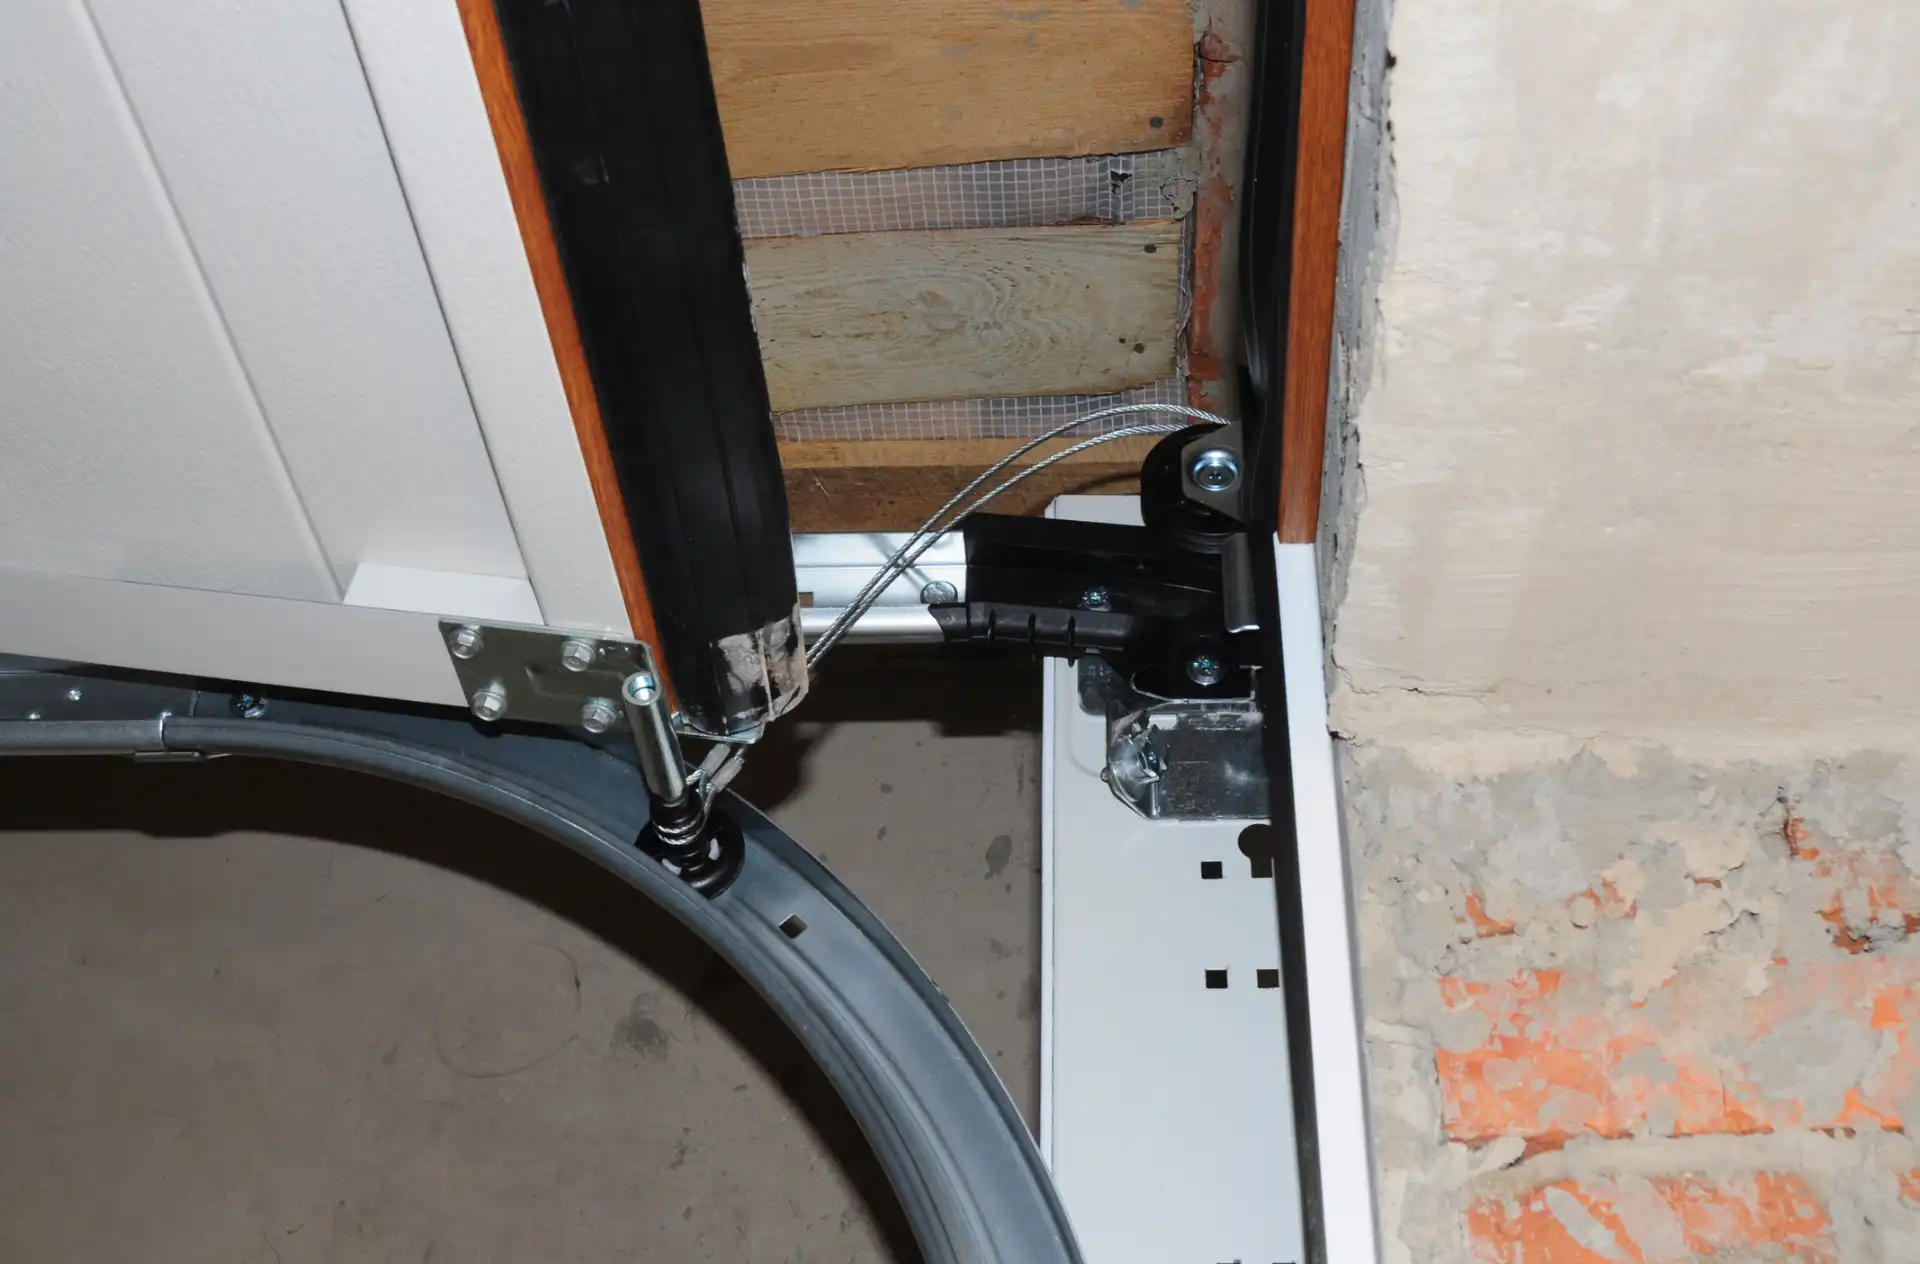
9. Adjusting Chain or Belt Drive Mechanisms
Regularly checking the tension of your garage door opener’s chain or belt is crucial for maintaining optimal performance. Slack in these components can lead to uneven door movement and additional stress on the motor.
Identifying Slack:
- Look for sagging or loose chains/belts during a garage door opener inspection.
- Listen for unusual noises that may indicate excessive slack.
Step-by-Step Adjustment Guide:
- Disconnect Power: Ensure safety by unplugging the opener.
- Locate Adjustment Bolts: Find the adjustment bolts on the chain or belt drive.
- Tighten Nuts: Use a wrench to turn the nuts clockwise for tightening, ensuring not to over-tighten.
- Re-check Tension: Verify proper tension by testing the door’s operation.
Performing these tasks as part of your maintenance checklist at least twice a year helps prevent issues and prolongs the life of your garage door opener.
When to Call a Professional Technician?
Some maintenance tasks are better left to the professionals, especially when it comes to the safety of adjusting spring tension. Garage door springs are under a lot of pressure—trying to fix or replace them without the right training can lead to serious injuries or damage to your system.
Here are some situations where you should call a professional garage door service:
- Spring Tension Balancing: If your door feels heavy, won’t stay open, or slams shut, the springs may need rebalancing. Only experienced technicians should handle this task due to the risks involved.
- Cable Replacement: Frayed or broken cables support the entire weight of your garage door. Mishandling cable repairs can lead to sudden drops or snapped lines.
- Opener Malfunction with Electrical Components: Faulty wiring, burnt-out circuit boards, or persistent electrical issues are best left to professionals who understand voltage and safety protocols.
- Structural Damage: Bent tracks, damaged panels, or issues with the opener’s mounting bracket often require specialized tools and expertise.
Trying to fix major problems on your own can put your safety at risk and void your garage door’s warranty. Professional tune-ups can catch small issues before they become bigger problems and help extend the life of your opener. Regular expert inspections, as mentioned in this Ultimate Guide to Maintaining Your Garage Door Opener, will ensure that everything is working smoothly and safely throughout the year.
Long-term Care Tips for Your Garage Door Opener’s Health
Ensuring the longevity of your garage door opener involves consistent care and attention. Here are some practical tips to maintain its optimal health:
- Routine Maintenance Schedule: Establish a bi-annual maintenance routine. Regular checks and minor adjustments prevent small issues from becoming significant problems.
- Weather Protection: Protect your opener from extreme weather conditions. Insulate your garage to maintain a stable temperature, which helps in reducing strain on the opener.
- Upgrading Components: Invest in high-quality parts when replacements are necessary, such as durable rollers or reinforced belts, to enhance the overall performance of your system.
- Monitoring Performance: Pay attention to any changes in the operation of your garage door opener. Early detection of issues like unusual noises or slower operation can save you from costly repairs.
- Professional Inspections: Schedule annual professional tune-ups even if there are no apparent problems. Professionals can spot potential issues that might not be visible to an untrained eye.
By following these long-term care tips, you can ensure that your garage door opener remains efficient and reliable over the years. These proactive steps contribute to the safety, performance, and longevity of your system, aligning with the insights provided in this Ultimate Guide to Maintaining Your Garage Door Opener.