
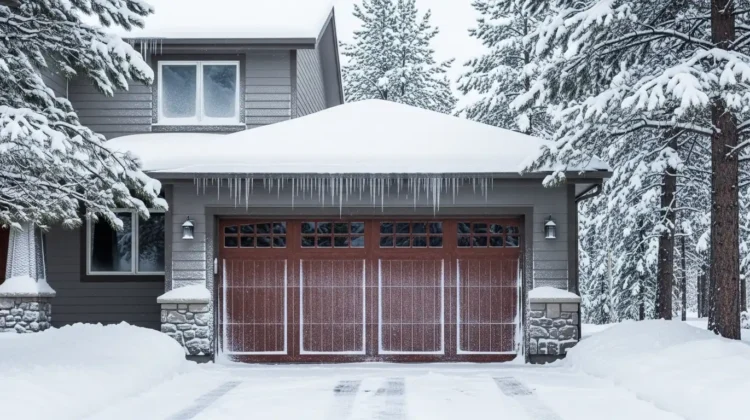
A garage door is often the largest moving entry point to your home, which makes it a prime target for winter’s harsh effects. Cold air, freezing rain, and snow can easily creep through worn seals or uninsulated panels. If you’ve ever noticed your garage feeling like an icebox — or found tools and stored items covered in frost — weatherproofing becomes an essential task.
Weatherproofing your garage door for winter provides several key benefits:
- Increased energy efficiency – A properly sealed and insulated door reduces heat loss, helping to maintain warmer temperatures inside the garage and adjacent rooms.
- Protection of belongings – Stored items such as paint, electronics, or seasonal decorations are less likely to suffer from moisture damage or freezing.
- Reduced utility bills – Minimizing drafts cuts down on heating costs during cold months.
- Improved comfort – A draft-free garage is much more pleasant to use as a workspace or entryway.
This How to Weatherproof Your Garage Door for Winter: Step-by-Step Guide walks you through practical techniques for winter garage door protection. You’ll learn how to inspect weatherstripping, add insulation, seal out drafts, lubricate moving parts, and maintain cleanliness — all with detailed tips and examples. Whether you’re a DIY enthusiast or tackling this project for the first time, these steps will help you create a well-insulated, energy-efficient space ready to handle whatever winter throws at it.
Step 1: Inspect and Replace Weatherstripping
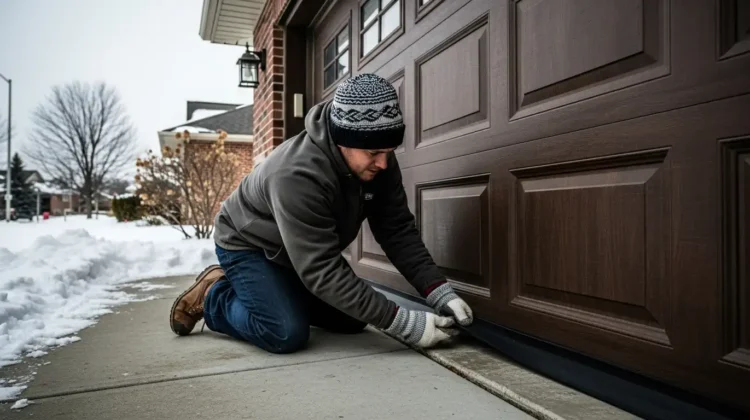
A tight seal is your first line of defense against winter’s chill. Begin by thoroughly inspecting the garage door weatherstripping. Run your hand along the edges and bottom of the door, checking for cracks, brittleness, gaps, or sections that have flattened out. Damaged or missing strips let in cold air, defeating your efforts to keep the garage warm.
Choose the Right Material:
Popular options include:
- Vinyl weatherstripping: Flexible and durable, resists moisture and UV damage.
- Foam tape: Easy to apply, good for minor gaps around the sides and top.
- Rubber or silicone: Often found as bottom seals for extra flexibility during freezing temperatures.
If you notice any part of the weatherstripping is hardened or no longer springs back when pressed, it’s time to replace it. Old material won’t compress properly, allowing drafts and moisture inside. Remove worn strips with a putty knife or screwdriver before installing new ones according to the manufacturer’s instructions.
Don’t forget the garage door sweep at the bottom. This crucial rubber or silicone strip blocks cold drafts from sneaking underneath. Make sure the sweep presses snugly against the floor without preventing smooth door operation. With new weatherstripping in place, including other types of weatherstripping, you set a solid foundation for keeping winter out and comfort in.
Step 2: Insulate the Garage Door
Benefits of insulating the garage door
- Heat retention: Insulating your garage door helps maintain a stable temperature, reduces heat loss, and keeps the space warmer during winter.
- Noise reduction: Insulated doors can dampen external noise, providing a quieter environment inside the garage.
Common insulation materials for doors
- Fiberglass batt: Easy to install and effective in retaining heat. Typically comes in rolls or batts that can be cut to fit your door panels.
- Polystyrene: Available in rigid panels, it’s lightweight and offers good thermal resistance. Ideal for DIY projects with insulation kits.
- Polyurethane: Provides superior insulation and structural strength. Often found in pre-insulated garage doors, it fills cavities completely and bonds well to surfaces.
Using insulation kits vs. replacing with an insulated model
- Insulation kits: These are cost-effective solutions that include pre-cut panels, adhesive, and instructions. They are designed for easy installation on existing doors.
- Replacing with an insulated model: Opting for a new insulated garage door can be more expensive but offers better insulation performance and long-term benefits.
Insulation not only enhances energy efficiency but also strengthens the door structure. By adding layers of insulation material, you improve the door’s durability against impacts and temperature fluctuations.
Step 3: Seal Gaps and Cracks Around the Door
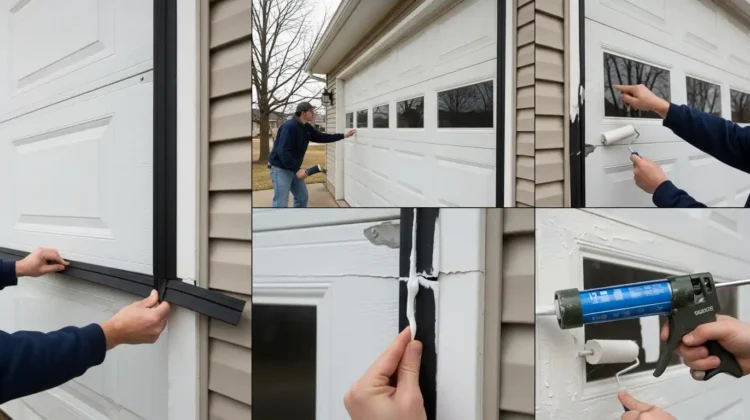
Unchecked gaps and cracks around your garage door frame are a major source of drafts and heat loss. To seal garage door gaps effectively, start by performing a close inspection along the perimeter of the door, focusing on corners, window edges, and where the frame meets the wall. Shine a flashlight from inside at night — light leaks signal air leaks.
A thorough job starts with removing any old caulk or deteriorated sealant. Use a putty knife or scraper for clean removal — fresh caulk adheres best to a debris-free surface. Look for signs of crumbling, cracking, or peeling material — these areas allow cold air to seep in.
Apply high-quality exterior-grade caulk (silicone or acrylic latex) in a continuous bead along seams around the frame and any windows. Smooth it out with a caulking tool or wet finger to ensure even coverage and maximum adhesion. This method closes off entry points for cold drafts, directly helping prevent heat loss.
Electrical outlets and switch boxes often go overlooked as draft sources. Install foam gaskets behind outlet covers or apply a bead of caulk around the box edges. These small changes can make a noticeable difference in interior comfort during the winter months.
By focusing on caulking garage door frame areas and sealing electrical penetrations, you reinforce your efforts to weatherproof your garage door for winter, targeting every weak spot where heat can escape.
Step 4: Lubricate Moving Parts for Smooth Operation
Keeping your garage door functioning smoothly during winter requires attention to its moving components. Cold weather can cause metal parts to contract, increasing friction and the risk of breakdowns. Proper lubrication is critical.
Start with a thorough cleaning:
- Remove old grease, hardened buildup, and dirt from screws, springs, hinges, and rollers using a clean rag and solvent if needed.
- This step ensures fresh lubricant adheres well and isn’t contaminated by debris.
Choose the right lubricant:
- Silicone-based lubricant garage door products are ideal because they don’t attract dust or gum up in low temperatures.
- Specialized garage door oils are also effective. Avoid using WD-40 or similar degreasers; these can strip away necessary protective oils rather than providing lasting lubrication.
How to lubricate garage door parts:
- Apply lubricant sparingly to each hinge pivot point, roller bearings (avoid nylon wheels if present), torsion springs, and the lock mechanism.
- Wipe away any excess to prevent drips or sticky residue.
Avoid lubricating the tracks themselves.
Oil on tracks causes rollers to slip or misalign, leading to noisy operation and uneven wear.
Regularly lubricating your garage door hardware reduces noise, prevents sticking in cold weather, and keeps moving parts protected from rust and corrosion. This routine maintenance is a simple way to extend the life of your door system through harsh winter conditions.
Step 5: Maintain Cleanliness During Winter Months
Winter maintenance is essential to ensure your garage door operates smoothly and remains weatherproof. Regularly clearing snow and ice buildup from seals and surfaces is crucial for maintaining the effectiveness of your weatherproofing efforts. Snow and ice can cause seals to wear out faster and create gaps where cold air can enter.
Here’s what you can do:
- Clean snow from garage seals: After each snowfall, clear any accumulated snow from the bottom seal and sides of the garage door. A broom or a plastic shovel works well for this task.
- Remove ice from garage door: If ice forms on or around your garage door, use a plastic scraper to gently remove it. Avoid using metal tools that can damage the seals or the door’s surface.
- Remove debris: Debris such as leaves, dirt, and small rocks can obstruct the operation of your garage door and damage the seals. Regularly check around the base of the door and clean out any accumulated debris.
Keeping these areas clean not only helps in maintaining weatherproofing but also ensures that your garage door functions efficiently during the winter months. This proactive approach can prevent minor issues from becoming significant problems, saving you time and money on repairs.
Additional Measures to Enhance Weatherproofing Your Garage Door For Winter
Winter-proofing your garage requires more than just addressing the basics. Several additional upgrades can take your efforts further, increasing energy efficiency, protecting plumbing, and keeping the interior dry and comfortable.
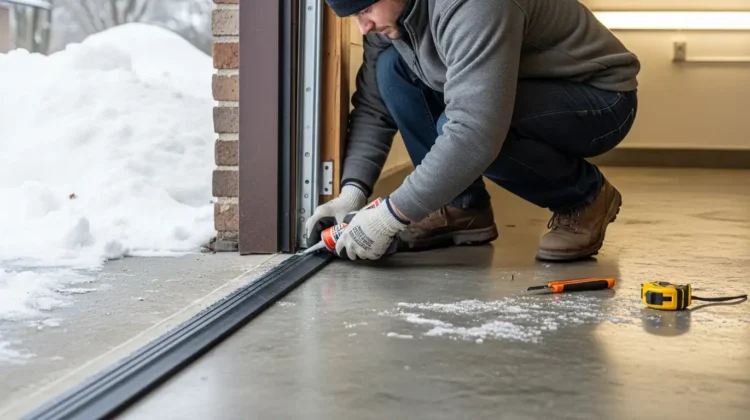
Install Threshold Seal on Garage Floor
A threshold seal is a heavy-duty, adhesive strip installed directly onto the garage floor where the door meets the ground. This simple upgrade delivers several immediate benefits:
- Blocks Wind Under Garage Door: An adhesive threshold seal forms a barrier against cold drafts that can leak in from beneath the door, making it much harder for frigid air to enter.
- Stops Rain and Snow Intrusion: Water tracked in by tires or blown in by storms often pools at the base of an unsealed door. A properly installed threshold prevents rain, snowmelt, and slush from seeping inside.
- Rodent Deterrence: Many pests — including mice — seek warmth during winter. A snug threshold seal limits their ability to squeeze into your garage.
- Long-Term Durability: Most modern threshold seals are made of rubber or PVC that resists cracking and splitting, even during harsh freeze-thaw cycles.
Threshold Seal Installation Tips:
- Clean and dry the floor area thoroughly before installation. Any debris or moisture will weaken the adhesive bond.
- Measure carefully. Cut the seal to fit precisely along the width of your garage door.
- Apply the manufacturer-supplied adhesive evenly along the marked line, then press the seal firmly in place.
- Allow proper curing time (usually a few hours) before operating your garage door.
This step alone can dramatically reduce drafts and moisture issues — critical if you want to protect pipes from freezing in garages or stop stored items from becoming damp.
Other advanced steps — such as waterproofing your garage floor with crystalline agents or epoxy coatings — offer another layer of protection against winter moisture damage. Epoxy coatings not only repel water but also resist stains from road salt and chemicals commonly brought in during icy months.
For those dealing with severe cold snaps or vulnerable plumbing, installing a dedicated garage heater maintains a temperature above freezing, safeguards pipes, and ensures a more comfortable space year-round. Heated garages also help maximize the energy efficiency benefits of weatherproofed doors by reducing heat loss through shared walls or entryways.
Enhancing these elements solidifies your efforts outlined in “How to Weatherproof Your Garage Door for Winter: Step-by-Step Guide,” ensuring every aspect of your garage stands up to seasonal challenges.
Waterproof Garage Floor
To winter-proof your garage effectively, waterproofing your garage floor is crucial. This step ensures that your floor remains dry and durable during the harsh winter conditions, preventing moisture-related damage.
Options for Waterproofing:
- Crystalline Concrete Agents: These agents penetrate deep into the concrete, forming crystals that block moisture pathways. They offer long-term protection and are ideal for both new and old concrete floors.
- Epoxy Coatings: Epoxy coatings provide a durable, high-gloss finish that is resistant to chemicals and abrasions. They create a waterproof barrier on the surface of the concrete, protecting it from moisture ingress.
- Waterproof Paint: A more budget-friendly option, waterproof paint adds a protective layer to your garage floor. Though not as robust as epoxy coatings or crystalline agents, it still offers effective moisture protection for lighter use conditions.
Benefits:
- Enhances energy efficiency by maintaining indoor temperature.
- Protects pipes from freezing by keeping the garage warmer.
- Prevents water damage and mold growth.
When you waterproof your garage floor, you complement other weatherproofing measures like installing a threshold seal on the garage floor or considering a garage heater. These steps collectively improve energy efficiency and protect your stored items through the winter months.
Consider Installing a Garage Heater
Adding a heater can significantly maintain warmth inside the garage during harsh winters. It is essential to keep the garage warm, not only for comfort but also to protect pipes from freezing in garages.
Advantages of installing a garage heater:
- Enhanced Comfort: A heated garage provides a more comfortable environment when working on projects or vehicles during winter. However, it’s important to use the heater safely, such as avoiding leaving a space heater on all night, which can pose risks.
- Protection from Freezing: Prevents pipes and other stored items from freezing, which can lead to costly repairs.
- Energy Efficiency: By maintaining a consistent temperature, you reduce the energy required to heat adjacent rooms, enhancing the overall energy efficiency benefits of weatherproofed garages.
- Safety for Vehicles: Keeps your vehicle warm, ensuring it starts more reliably in cold weather and reducing wear on the engine.
To winter-proof your garage effectively, consider installing a garage heater along with other measures, such as threshold seal installation and waterproofing your garage floor. These steps collectively block wind under the garage door and protect against moisture intrusion, creating a more durable and efficient space.
Conclusion
Staying proactive with your winter garage door maintenance checklist keeps your garage secure, energy efficient, and protects everything stored inside from harsh weather. Regular inspections make a difference. Check the weatherstripping, look for signs of wear on moving parts, and listen for unusual noises during operation. A quick monthly inspection paired with lubrication of springs, rollers, and hinges using a silicone-based product helps prevent sticking or malfunction caused by cold temperatures.
Key reminders for winter garage door care:
- Inspect all seals and weatherstripping monthly.
- Lubricate moving parts to counteract metal contraction and freezing.
- Remove snow, ice, and debris from the door’s base and tracks promptly.
If you notice persistent drafts, broken panels, or mechanical issues beyond standard maintenance, it might be time to consult professional overhead door services. Attempting major repairs without proper experience can lead to costly damage or injury. Local experts have the tools and knowledge to provide reliable installation, insulation upgrades, or complete replacements.
For step-by-step guidance on how to address each aspect of garage door winterization, bookmark this How to Weatherproof Your Garage Door for Winter: Step-by-Step Guide. Consistent care saves heating costs and extends the life of your garage door system — protecting your investment for years ahead.