
Hey there, garage door enthusiasts! Garage door sensors, often called safety sensors, are small but mighty devices that play a crucial role in home safety and efficiency. If you’ve ever wondered exactly where they’re located or how they work, this guide is for you.
These sensors are typically positioned on either side of your garage door, just a few inches above the ground. By creating an invisible beam across the door’s opening, they detect obstacles and stop (or even reverse) the door to prevent accidents. Ever since sensors became mandatory under U.S. legislation in 1993, they’ve been essential for keeping not only your family and pets safe but also protecting your vehicle and belongings from accidental damage.
Quick Overview: Why Sensor Location Matters
Understanding where your garage door sensors are positioned and how they function is key to ensuring smooth operation and a safer home environment. Knowing their placement also makes it easier to troubleshoot issues on your own, potentially saving you time and money.
Understanding Garage Door Sensors
Garage door sensors, often simply referred to as safety sensors, do more than just prevent accidents; they’re integral to the entire door mechanism’s safety and functionality. These sensors send a signal to the garage door opener whenever an object (or person) crosses their beam while the door is closing, prompting it to stop or reverse.
This isn’t just a nifty feature; it’s a vital safety measure that ensures your garage door won’t close on your car, a family member, or even your pet. Understanding how these sensors work—and where they’re located—can help you maintain them better, keeping your garage door safe and operational.
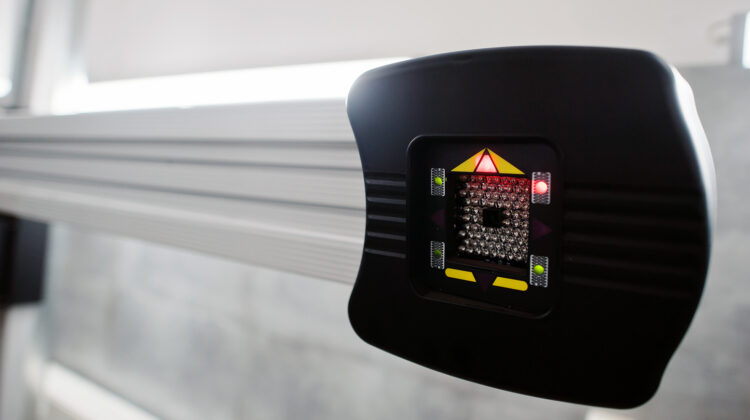
Types of Garage Door Sensors
You’ll find a few different types of garage door sensors available on the market, each with its own unique features and benefits. Here’s a rundown of the most common types:
- Infrared Sensors: The most common type of garage door sensor, infrared sensors emit an invisible beam across the width of the garage door opening. If something disrupts this beam, the sensor signals the opener to stop or reverse the door. Think of it like a high-tech tripwire: simple but effective.
- Photoelectric Sensors: These work similarly to infrared sensors but use a light beam instead. A transmitter emits the beam, while a receiver detects it. If an object blocks the beam, the door’s movement is halted or reversed, making it an excellent choice for safety.
Both types serve the same purpose: to prevent accidents by ensuring nothing gets trapped beneath a closing garage door. By understanding how they function, you can appreciate the role they play in your garage door’s overall safety and take steps to maintain them effectively.
Proper Placement and Installation of Garage Door Sensors
To ensure that your garage door sensors work as intended, it’s important to install them correctly. These sensors, often encased in small black boxes, must be positioned just right to function optimally. Here’s a guide to proper placement and installation:
Guidelines for Sensor Positioning
- Location: Garage door sensors need to be installed on both sides of the door, near the floor. This location ensures they can monitor the entire width of the garage entrance effectively.
- Height: Position the sensors between 2 and 6 inches above the ground. This specific height enables the sensors to detect small obstacles, like children’s toys or pets, ensuring that the beam is interrupted if something is in the way.
This low placement effectively creates an invisible tripwire across your garage’s entrance. So if anything—or anyone—crosses the path while the door is closing, the garage door mechanism receives an immediate signal to halt or reverse, thus preventing accidents.
Installation Tips for Optimal Performance
- Alignment: Make sure both sensors face each other directly. Misalignment is a common issue, and even a small shift can disrupt the sensors’ function. For example, users often report issues with the MyQ app due to sensor misalignment, even when they appear physically aligned.
- Secure Mounting: Fasten each sensor securely to its bracket. Over time, loose brackets can shift the sensors slightly, causing them to malfunction. This little step goes a long way in maintaining reliable performance.
By following these positioning and installation tips, you not only enhance the safety of your garage door but also extend the lifespan of your sensors, helping maintain a hassle-free environment in your garage.
Troubleshooting Common Issues with Garage Door Sensors
While garage door sensors are invaluable, they’re not immune to the occasional hiccup. Here are some of the most common issues you might encounter—and how to resolve them:
Common Problems with Garage Door Sensors
- Misalignment: Since the sensors work by creating a straight beam, they need to be aligned perfectly. If one or both sensors shift out of position, the beam is disrupted, preventing the door from closing properly or causing it to reverse unexpectedly.
- Dirty Lenses: Located close to the ground, sensor lenses can quickly accumulate dirt and debris, which can obstruct the beam and lead to malfunctions. This common issue can cause the door to reverse unnecessarily or refuse to close altogether.
- Damaged Wires: Over time, wires connecting the sensors to the opener may wear out or sustain damage, which can impact their performance and lead to erratic garage door behavior.
Simple Troubleshooting Techniques
- Cleaning Sensor Lenses: Use a soft cloth to regularly clean the sensor lenses and prevent dirt build-up. Avoid harsh chemicals as they may damage the lens coating.
- Realigning the Sensors: Check if both sensors are aligned directly with each other. If misaligned, adjust them until both lights turn on, indicating a proper connection.
- Inspecting Wires: Look closely for visible signs of wear or damage on the wiring. If issues are present, consider hiring a professional to repair or replace the wires to ensure safe operation.
Knowing where your sensors are located and how to troubleshoot them allows you to address minor issues on your own. This knowledge can save you time, prevent unnecessary service calls, and keep your garage door system running smoothly.
Testing and Maintaining Your Garage Door Sensors
To keep your garage door sensors in peak working condition, regular testing and maintenance are essential. Here are some practical methods for testing your sensors, along with a few maintenance tips:
Testing Methods for Garage Door Sensors
- The Cardboard Box Test: Place a medium-sized cardboard box in the path of the closing garage door. Activate the door, and observe whether it stops or reverses upon reaching the box. This test is a quick way to confirm your sensors are functioning as intended.
- Visual Test: Check the indicator lights on each sensor. A steady light usually indicates proper alignment, while a blinking light may signal misalignment or another issue.
- Manual Interruption: During the door’s closing motion, wave a long object (like a broom) across the sensor beam to see if the door reverses. This simple test provides additional reassurance that the sensors are working effectively.
Routine Maintenance Tips
- Cleaning: Dust and dirt can easily build up on the sensor lenses, so it’s wise to wipe them down with a soft cloth every few months.
- Alignment Check: Periodically check that the sensors are facing each other and level. Misaligned sensors can disrupt the door’s operation.
- Wiring Inspection: Inspect the sensor wires for signs of wear or damage. Addressing any issues early can prevent more significant problems later.
- Height Verification: Make sure sensors are installed 2 to 6 inches above the ground, per safety guidelines. This placement is optimal for detecting low-lying obstacles.
By incorporating these maintenance routines, you’ll ensure that your garage door sensors continue functioning smoothly, minimizing any disruptions to your day-to-day life.
Additional Troubleshooting Resources
Sometimes, issues with your sensors can signal a deeper problem with your garage door opener. For instance, specific error codes, like the Raynor garage door error code 4-6, can provide clues about issues that go beyond simple sensor misalignment or dirty lenses.
If you’re interested in a deeper dive into error codes or garage door opener troubleshooting, check out resources like our guide on How to Tell When You Need Electric Gate Repair, which covers similar technology.
Key Takeaways
Understanding the importance of garage door sensor placement and functionality can make a world of difference in maintaining a safe and efficient garage door system. Here’s a quick recap:
- Sensor Placement: Located on both sides of the door, about 2-6 inches from the ground, sensors create a safety beam that prevents accidents.
- Types of Sensors: Infrared and photoelectric sensors both enhance safety by detecting obstacles in the path of a closing garage door.
- Maintenance: Regular cleaning, alignment, and wire inspection help keep your sensors in peak condition.
- Troubleshooting Tips: Knowing how to address common issues, such as misalignment or dirty lenses, helps you maintain smooth and reliable operation.
For more on keeping your garage safe and functional, explore our guide on the Top 3 Reasons to Hire a Professional Garage Door Service and learn when it might be time to call in the experts.
Understanding your garage door sensors means you’ll never be caught off guard by unexpected issues. With a little knowledge, you can confidently maintain your garage door, keeping it safe and functional for years to come.